
Liquid Glass DesignDesign7 min read
Liquid Glass photo watermark: apps, Figma and CSS
Add a Liquid Glass photo watermark with camera info (device, focal length, ISO): the iPhone app, a Figma Glass method, a CSS version and legibility tips.
On this page
A Liquid Glass photo watermark is a small translucent capsule placed on the photo itself, usually at the bottom, showing the camera details: device model, focal length, aperture, shutter speed, ISO, and sometimes the date and location. On iPhone the app built specifically for this is Photo Liquid Glass; you can also make one in Figma with its Glass effect, or in a few lines of CSS.
It's a newer take on the EXIF frame, the white border with a camera logo and shot settings that phone photographers have been adding for years. The glass version drops the border and floats the information over the image, styled like iOS 26's controls.
Apps that add a Liquid Glass watermark
Photo Liquid Glass (iPhone)
The App Store listing is titled in Chinese, 照片液态玻璃水印, and the English description calls it Photo Liquid Glass. It's built for exactly this look. Here's what the listing says, as of version 1.2 (September 2026):
- It reads device model, capture time, focal length, aperture, shutter speed, ISO and location from the photo, and every field can be edited by hand.
- There are two glass styles, Clear and Soft, a capsule or rounded rectangle shape, and sliders for refraction, thickness, blur, frost, highlights and corner radius.
- It handles Live Photos, keeping the motion and audio.
- On iOS 16 or later you can batch process with a Shortcuts shortcut, including from the Photos share sheet. The shortcut is downloaded from an external webpage.
- Exports are HEIC or JPEG.
On privacy, the listing says photos and capture information are processed on the device, nothing is uploaded to a developer-operated server, and there are no advertising, analytics or tracking SDKs. The app is free; a one-time "Support the Developer" purchase doesn't unlock anything. It's new and has very few ratings, so treat those claims as the developer's own.
EXIF frame apps with a different look
If you want camera info but not necessarily glass, the established EXIF frame apps are worth a look. None of these listings mention a glass watermark style, so check the screenshots before you install.
- Cameramark: Photo EXIF Frame reads EXIF into a frame around the photo, converts GPS to a place name and reads Fujifilm film simulations.
- OneLine: EXIF Frame & Watermark has watermark templates, camera logos and personal signatures.
- PhotoMark: Photo Frame & EXIF includes a Blur Frame mode that builds the backdrop from the photo itself, which comes closest to a glass feel of the apps here.
- Shutternote: EXIF Photo Frame uses a Liquid Glass interface for its own controls; its frame layouts put the information in a border around the photo.
Make one in Figma
Figma's Glass effect does most of the work, and it gives you more control over placement and type than an app.
- Put your photo in a frame at its native aspect ratio. Export size can come later.
- Draw a rectangle for the capsule. A good starting size is about 40 to 50 percent of the photo's width, with a fully rounded corner radius.
- Add Glass from the Effects panel. Glass doesn't show on a fill at 100 percent opacity, and Figma's own tutorial notes that applying it sets the fill to 20 percent automatically; for a watermark, a dark fill at around 20 to 35 percent works better than white.
- Tune the effect. The settings are light angle, light intensity, refraction, depth, dispersion, frost and splay. For a watermark, keep refraction moderate, dispersion low (it's the rainbow fringe), and add some frost so the text has a calmer surface behind it.
- Add the text on top as a separate layer: device model in a semibold weight, then the settings in regular weight. Use tabular figures if your font has them so the numbers line up.
- Export as PNG or JPEG. Glass isn't supported in SVG export.
Two limits to know: you can't combine Glass and a background blur on the same layer, and a background-blurred layer placed above a glass layer stops the glass from rendering. If the photo is busy, add a separate dark layer at low opacity under the capsule instead.
Figma's Glass effect playground community file is a quick way to see what each slider does before you tune your own.
To read the values, open the photo in the iOS Photos app and tap the info button, or check the file info in Lightroom or Finder. Typing them into a Figma component with text properties makes the next photo a two minute job.
For the type itself, the camera app concept Camera 2025 by yuhang is a useful reference: the ISO, shutter speed and aperture readouts sit in a monospaced face on a dark translucent strip over the viewfinder.

Or build it with HTML and CSS
For a portfolio site or a batch script that renders images in a headless browser, CSS gets you a frosted version. This uses backdrop-filter, so it's blur and saturation, not true refraction, which is usually what you want for small text anyway.
<div class="photo">
  <div class="exif">
    <span class="device">Camera model</span>
    <span class="sep">|</span>
    <span>35mm f/2.8 1/250s ISO 100</span>
  </div>
</div>

<style>
.photo {
  position: relative;
  width: min(100%, 720px);
  aspect-ratio: 3 / 4;
  background: url("photo.jpg") center / cover;
  border-radius: 12px;
  overflow: hidden;
}
.exif {
  position: absolute;
  left: 50%;
  bottom: 4%;
  transform: translateX(-50%);
  display: flex;
  gap: 0.9em;
  align-items: center;
  padding: 0.55em 1.1em;
  border-radius: 999px;
  font: 500 clamp(11px, 2.2vw, 15px)/1.2 -apple-system, system-ui, sans-serif;
  font-variant-numeric: tabular-nums;
  color: #fff;
  white-space: nowrap;
  background: rgb(0 0 0 / 0.18);
  -webkit-backdrop-filter: blur(12px) saturate(170%);
  backdrop-filter: blur(12px) saturate(170%);
  box-shadow:
    inset 0 1px 0 rgb(255 255 255 / 0.45),
    inset 0 0 0 1px rgb(255 255 255 / 0.18),
    0 4px 16px rgb(0 0 0 / 0.2);
  text-shadow: 0 1px 2px rgb(0 0 0 / 0.35);
}
.exif .device { font-weight: 600; }
.exif .sep { opacity: 0.5; }
</style>
The inset highlight on top and the 1px inner ring give the capsule its glass edge. backdrop-filter works unprefixed in current Chrome, Firefox and Safari; the -webkit- line covers older Safari.
Keeping the text readable on any photo
Most watermarks that don't work fail on legibility, because photos have bright skies, white walls and busy foliage exactly where the capsule wants to sit.
- Place it over the calmest part of the frame. Bottom center is the convention, but a bottom corner over shadow often reads better than the center over a bright sidewalk.
- Darken the glass on bright photos. Apple's Human Interface Guidelines suggest a dark dimming layer of about 35 percent opacity behind clear glass when the content underneath is bright. In the CSS above, that means raising the black background from 0.18 toward 0.35.
- Use white text with a soft shadow. A 1 to 2px shadow at low opacity is invisible on dark areas and saves the text on light ones.
- Keep it to one line. Device model plus four settings is about as much as a capsule can hold at phone size. Put the date and place on a second, smaller capsule if you need them.
- Check the size where it'll be seen. Open the export on a phone at feed size; if you have to zoom to read the ISO, the text is too small.
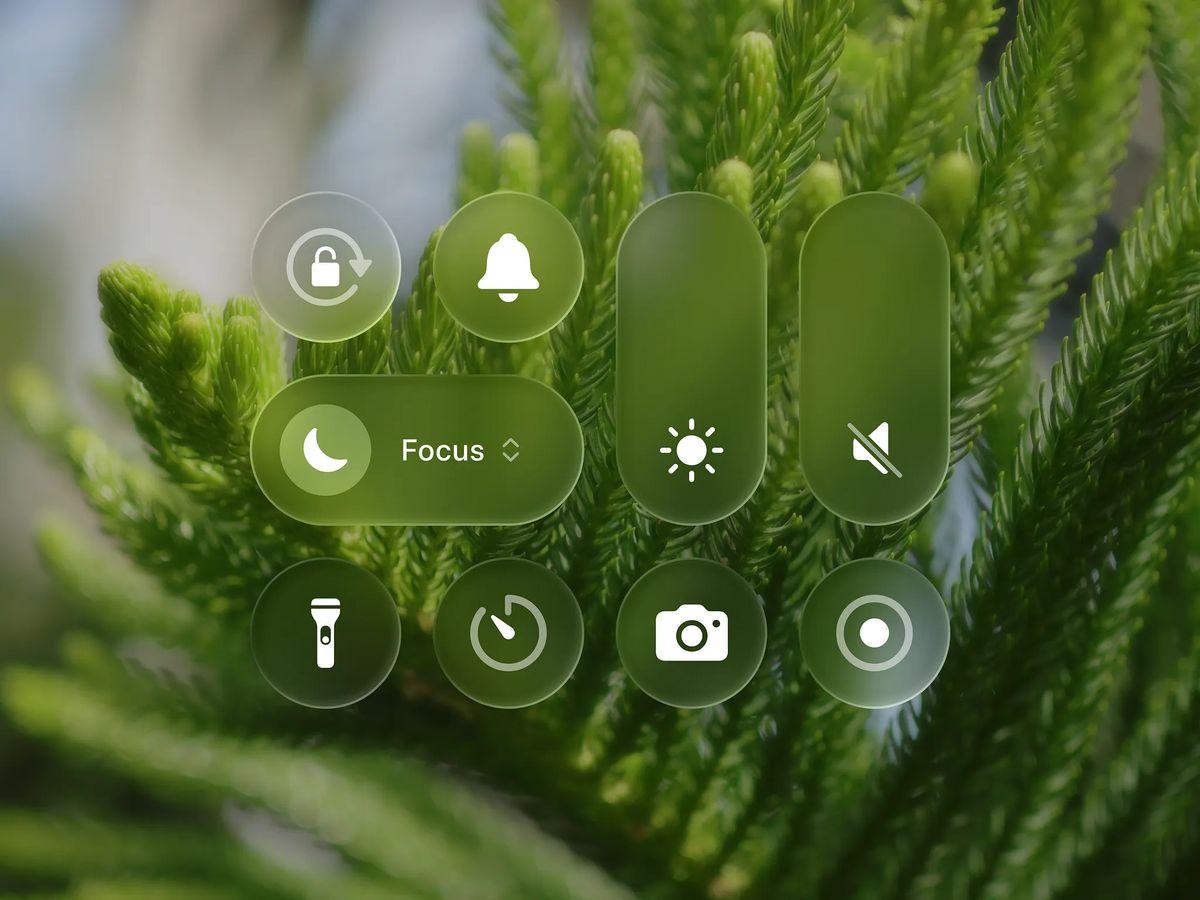
Glass also needs something to pick up. Glass on image in our gallery shows Control Center style glass buttons over a close-up of green foliage: the glass takes on the green, and white icons stay readable because the photo behind is out of focus and mid-tone. Over a sharp, high-contrast photo you have to create that softness yourself with more frost.
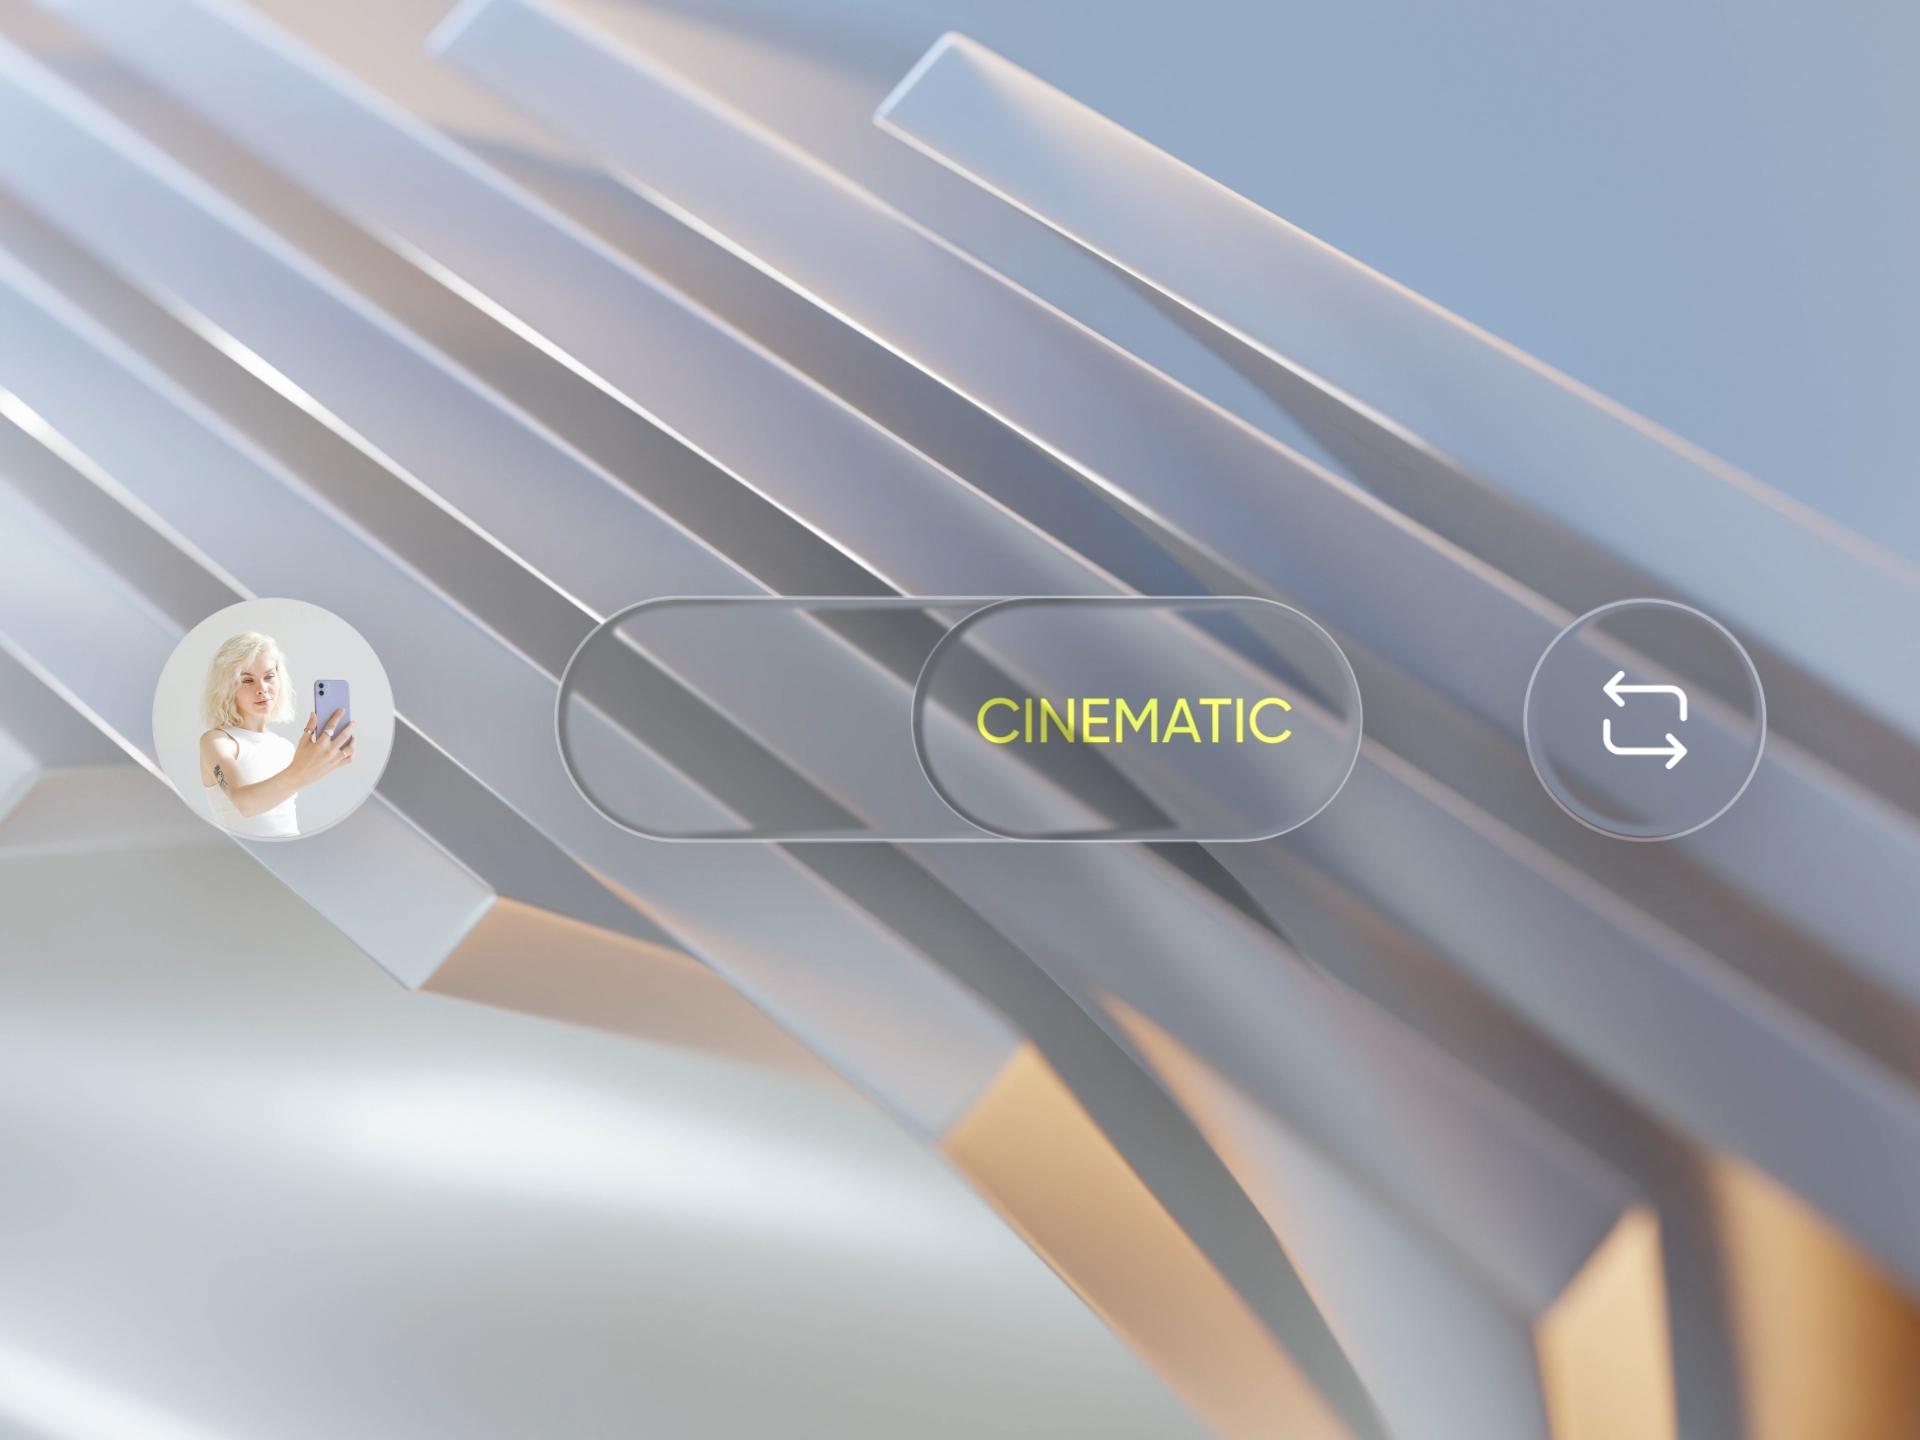
On bright photos, lean on the edge highlight. Liquid Glass Camera Toolbar by MAni Ghafouri puts glass capsules over a bright, white 3D render, and the edge highlights are what separate the controls from the background.
A privacy note on location
Putting the location on the watermark publishes where you were, and the file itself may still carry GPS coordinates in its EXIF even if you leave location off the capsule. On iPhone, Apple's guide is to tap Share in Photos, then Options, and turn off Location before sharing. That switch applies to that one share and doesn't change the original in your library, and it isn't offered when you pick a photo from inside some other apps, so check the copy you actually send if it matters.
For more on why glass needs detail behind it to look like glass, see what Liquid Glass is, and browse the gallery for more glass-over-photo layouts.
Versions, settings and figures checked on 14 November 2026.
Sources
- https://apps.apple.com/us/app/%E7%85%A7%E7%89%87%E6%B6%B2%E6%80%81%E7%8E%BB%E7%92%83%E6%B0%B4%E5%8D%B0/id6807027325
- https://apps.apple.com/us/app/cameramark-photo-exif-frame/id6447237830
- https://apps.apple.com/us/app/oneline-exif-frame-watermark/id6476151887
- https://apps.apple.com/us/app/photomark-photo-frame-exif/id6499131459
- https://apps.apple.com/us/app/shutternote-exif-photo-frame/id6757407209
- https://help.figma.com/hc/en-us/articles/360041488473-Apply-effects-to-layers
- https://help.figma.com/hc/en-us/articles/38456797147415-Illustrate-a-flower-vase-using-shapes-transforms-and-the-glass-effect
- https://developer.apple.com/design/human-interface-guidelines/materials
- https://support.apple.com/guide/personal-safety/ips0d7a5df82
- https://caniuse.com/css-backdrop-filter